Secure API Calls from DB Functions with Supabase pg_net and Vault
Introduction
In many applications, you need to call an external API every time a new record is inserted in your database. One common use case I find my self using is sending a Slack notification when a new user signs up, or adding their info to a CRM.
In this post, we’ll walk through using the pg_net extension for PostgreSQL to make HTTP requests from database triggers, and storing sensitive information (like API keys) securely with Supabase Vault.
By the end of this tutorial, you’ll have a secure and scalable setup for automatically call APIs from your DB functions — without exposing secrets in your code.
Table of Contents
- Setting Up the Project
- Introducing to pg_net
- Making a Test HTTP Call
- Integrating with the Trigger
- Why Use Vault?
- Setting Up Secrets in Vault
- Reusable Secrets Decryption
- Conclusion and Next Steps
Setting Up the Project
I’m using a base Supabase project that includes:
- A
messagestable. - A trigger that fires whenever a new row is inserted into the
messagestable. - A dummy function that is called by the trigger. This is where we’ll make the HTTP request.
All this initial code is available in the withsupabase repo. To start, clone the repo and navigate to the db-functions-api-calls directory:
git clone https://github.com/tomaspozo/withsupabase
cd withsupabase/db-functions-api-calls
Note: Take a moment to review the
README.mdfile for any additional setup requirements.
Let's start Supabase locally by running:
supabase start
This command will initialize all necessary Supabase services locally on your machine, now let's apply our migrations by running:
supabase migration up
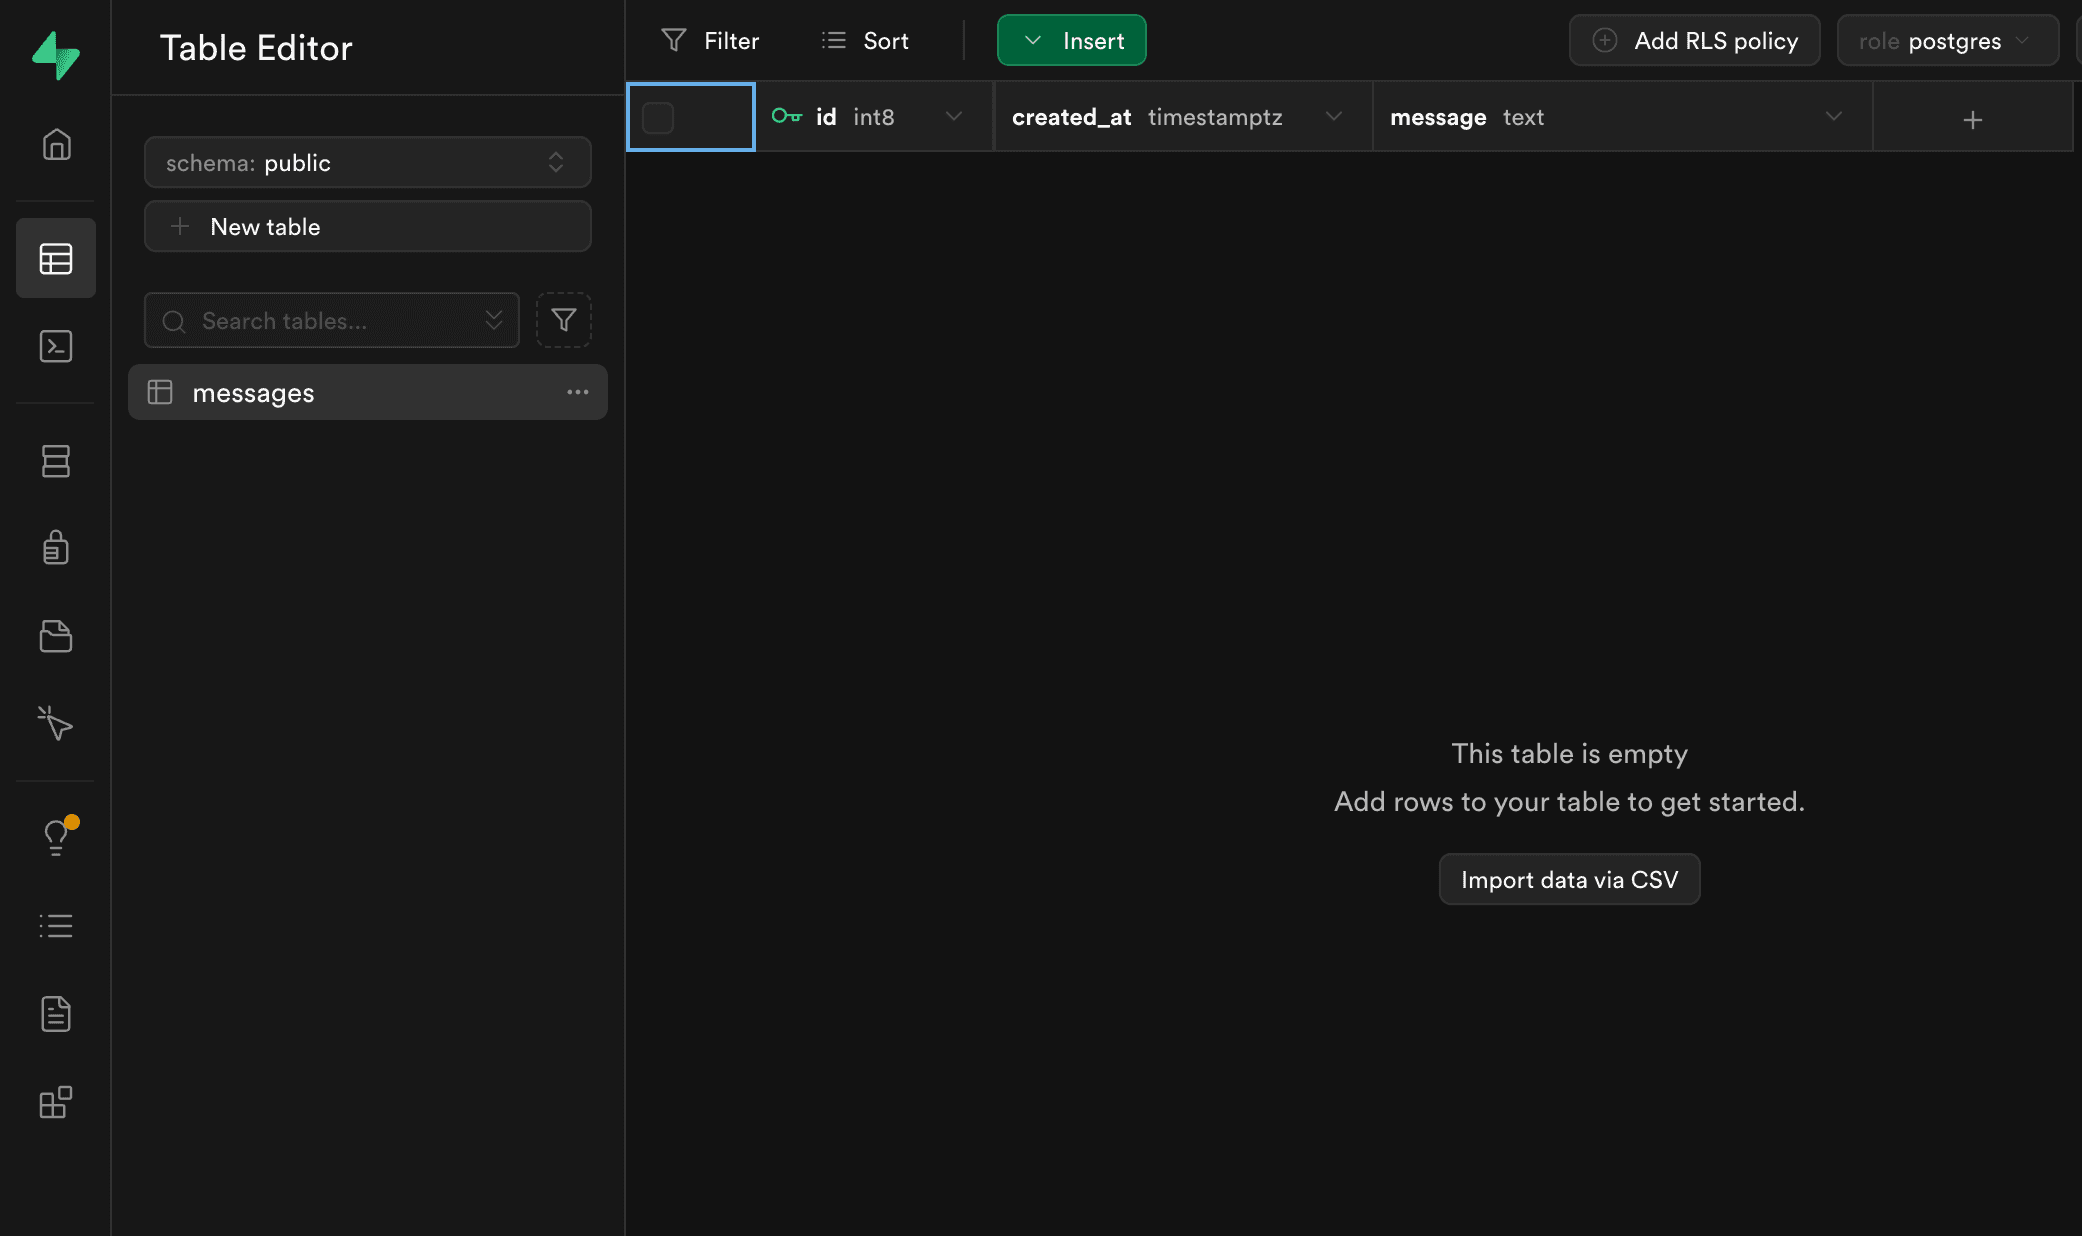
You can now visit Supabase Studio at http://127.0.0.1:54323. And navigate to the Table Editor, you should the messages table:
Introducing to pg_net
The pg_net extension allows us to make HTTP requests (GET, POST, etc.) directly from within PostgreSQL.
Note: the pg_net extension is already enabled in the provided base project.
We can use a function called net.http_post to POST data to an external endpoint. This is a minimal example showing how it works:
SELECT net.http_post(
    'https://postman-echo.com/post', -- endpoint url
    '{"hello": "world"}'::JSONB, -- request body
    headers := '{"API-KEY-HEADER": "<API KEY>"}'::JSONB -- request headers
) AS request_id;
pg_netoffers other functions for different http methods. You can read more about them on the supabase/pg_net repo.
Now let's continue implementing our case.
Making a Test HTTP Call
Before hooking it into our trigger, let’s do a quick test. We’ll use a temporary webhook service to see the requests in real time, webhook-test.com (though you can use any similar service).
- Copy the upper
net.http_postcall into the Supabase SQL editor. - Go to webhook-test.com.
- Generate a temporary webhook URL.
- Update the URL into our
net.http_postcall, and run it.
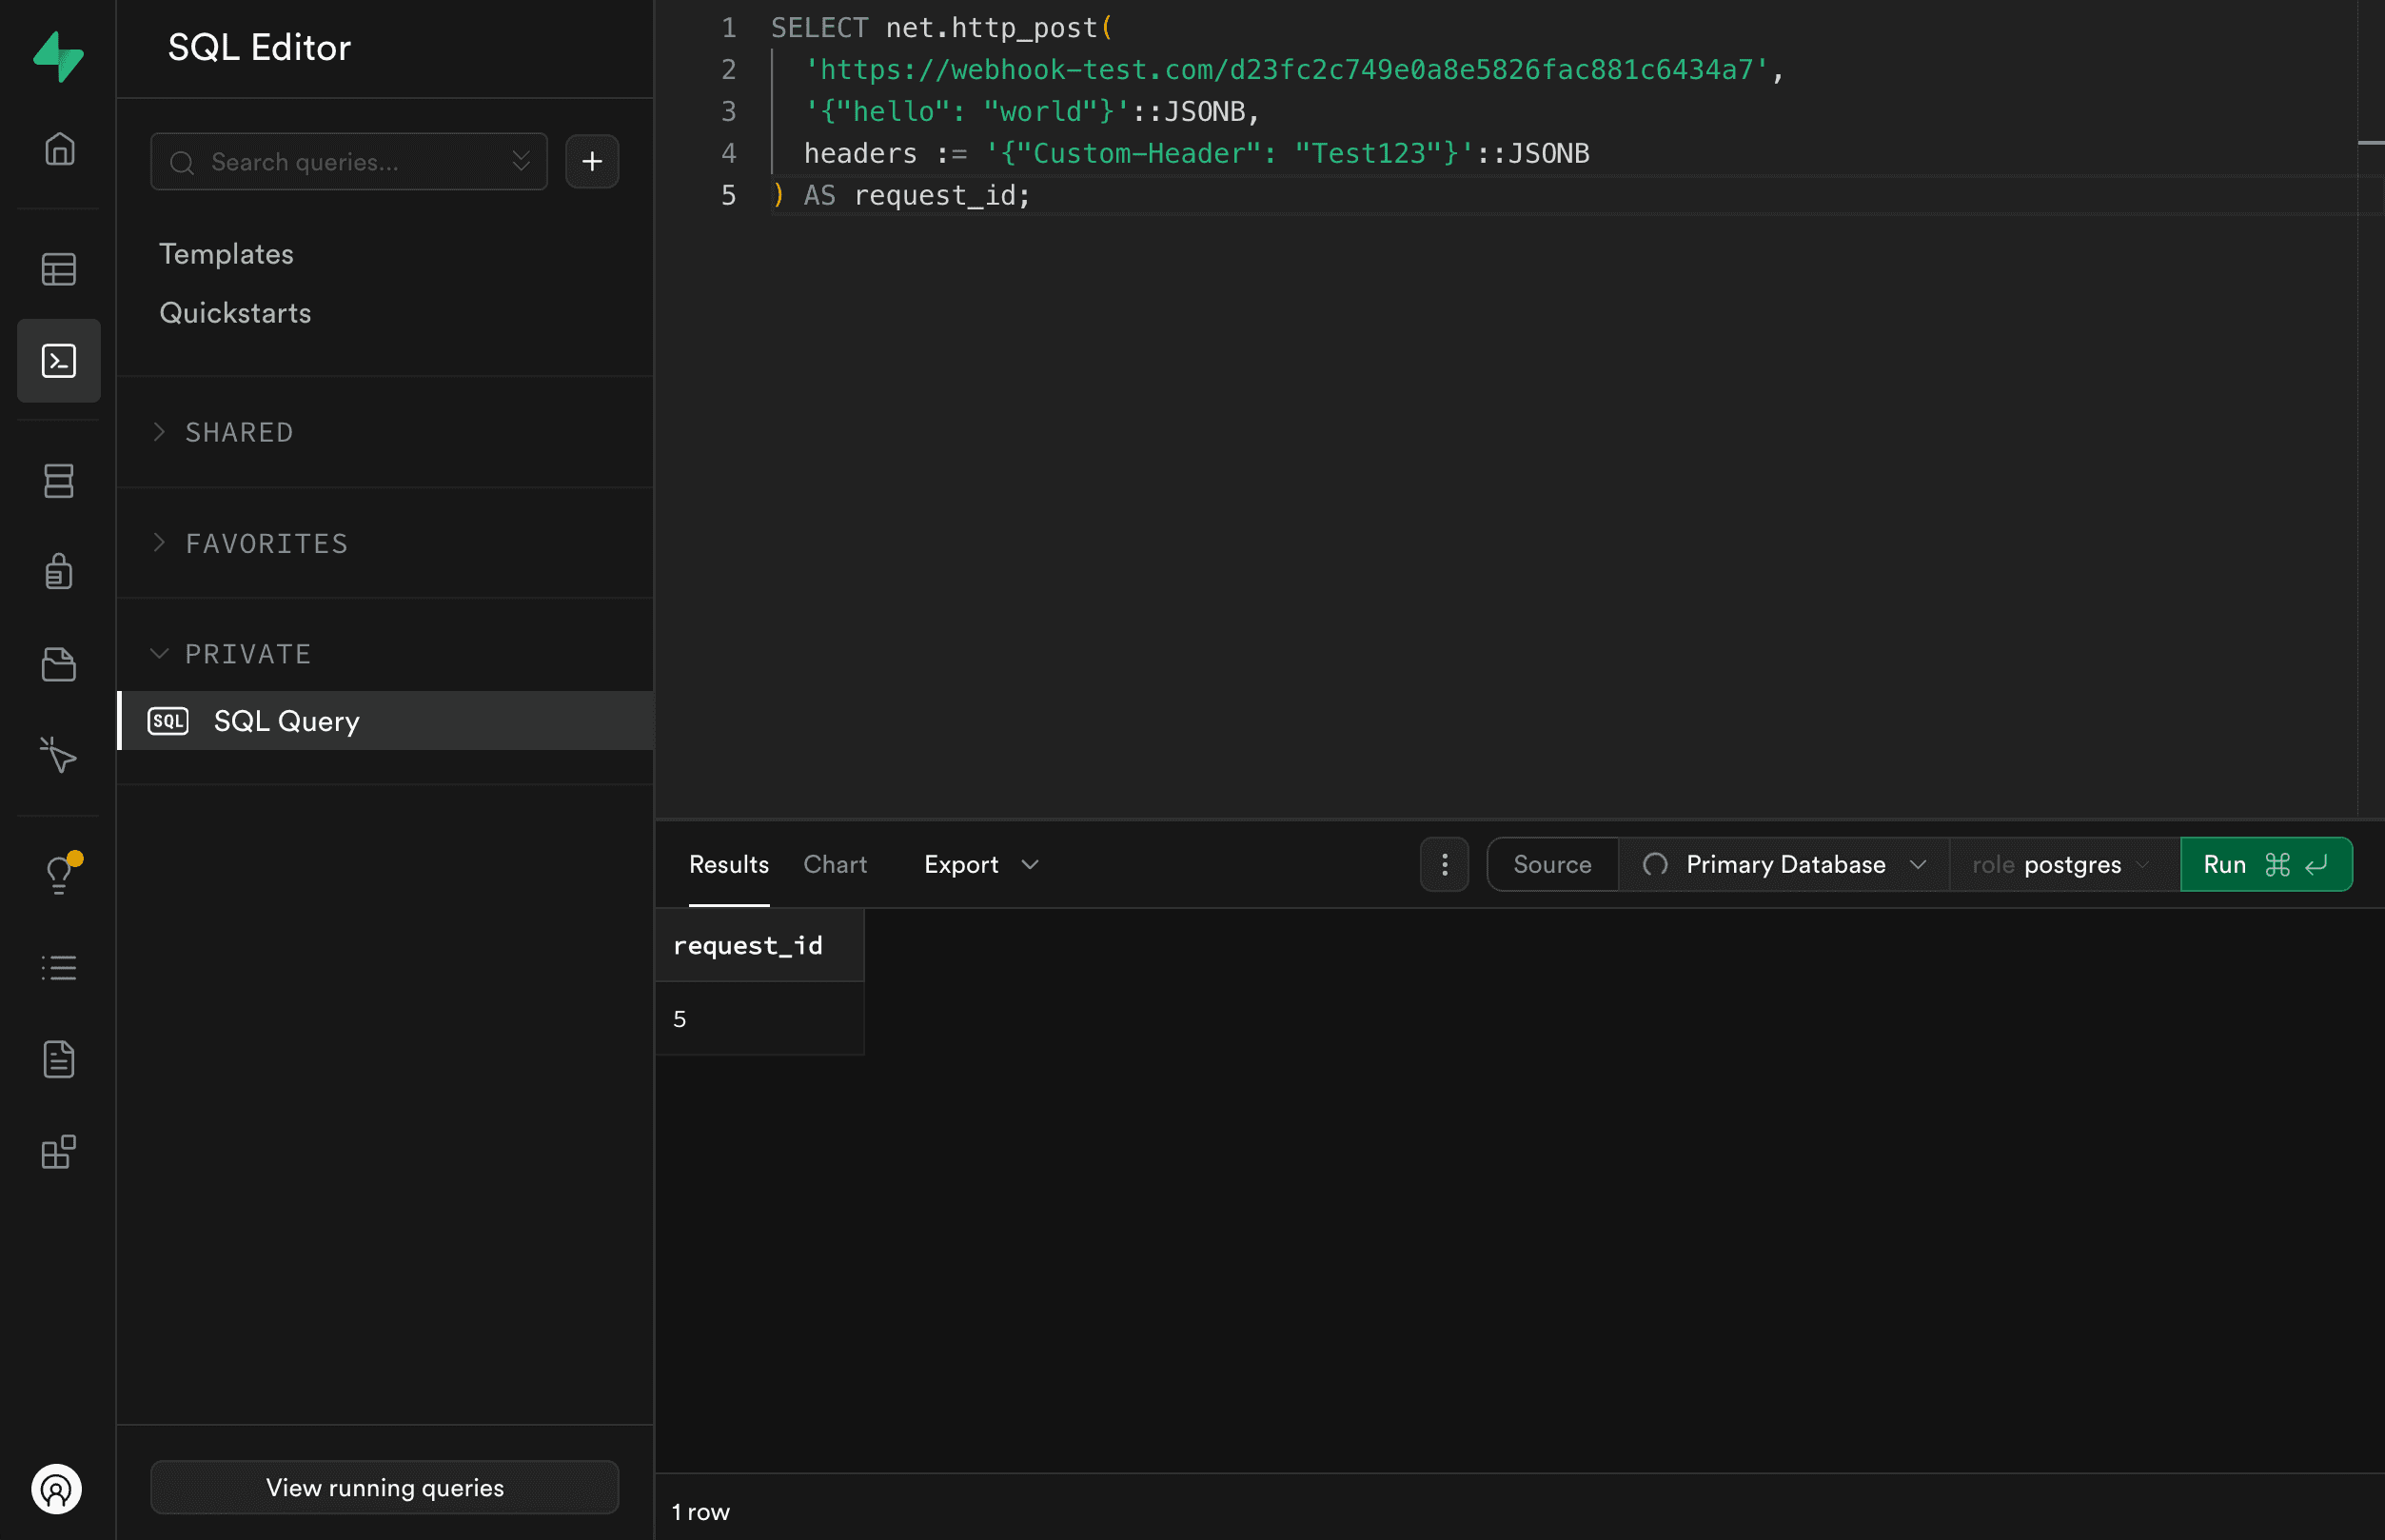
If it succeeds, you’ll see a request ID, and on webhook-test.com you’ll see the incoming payload and header:
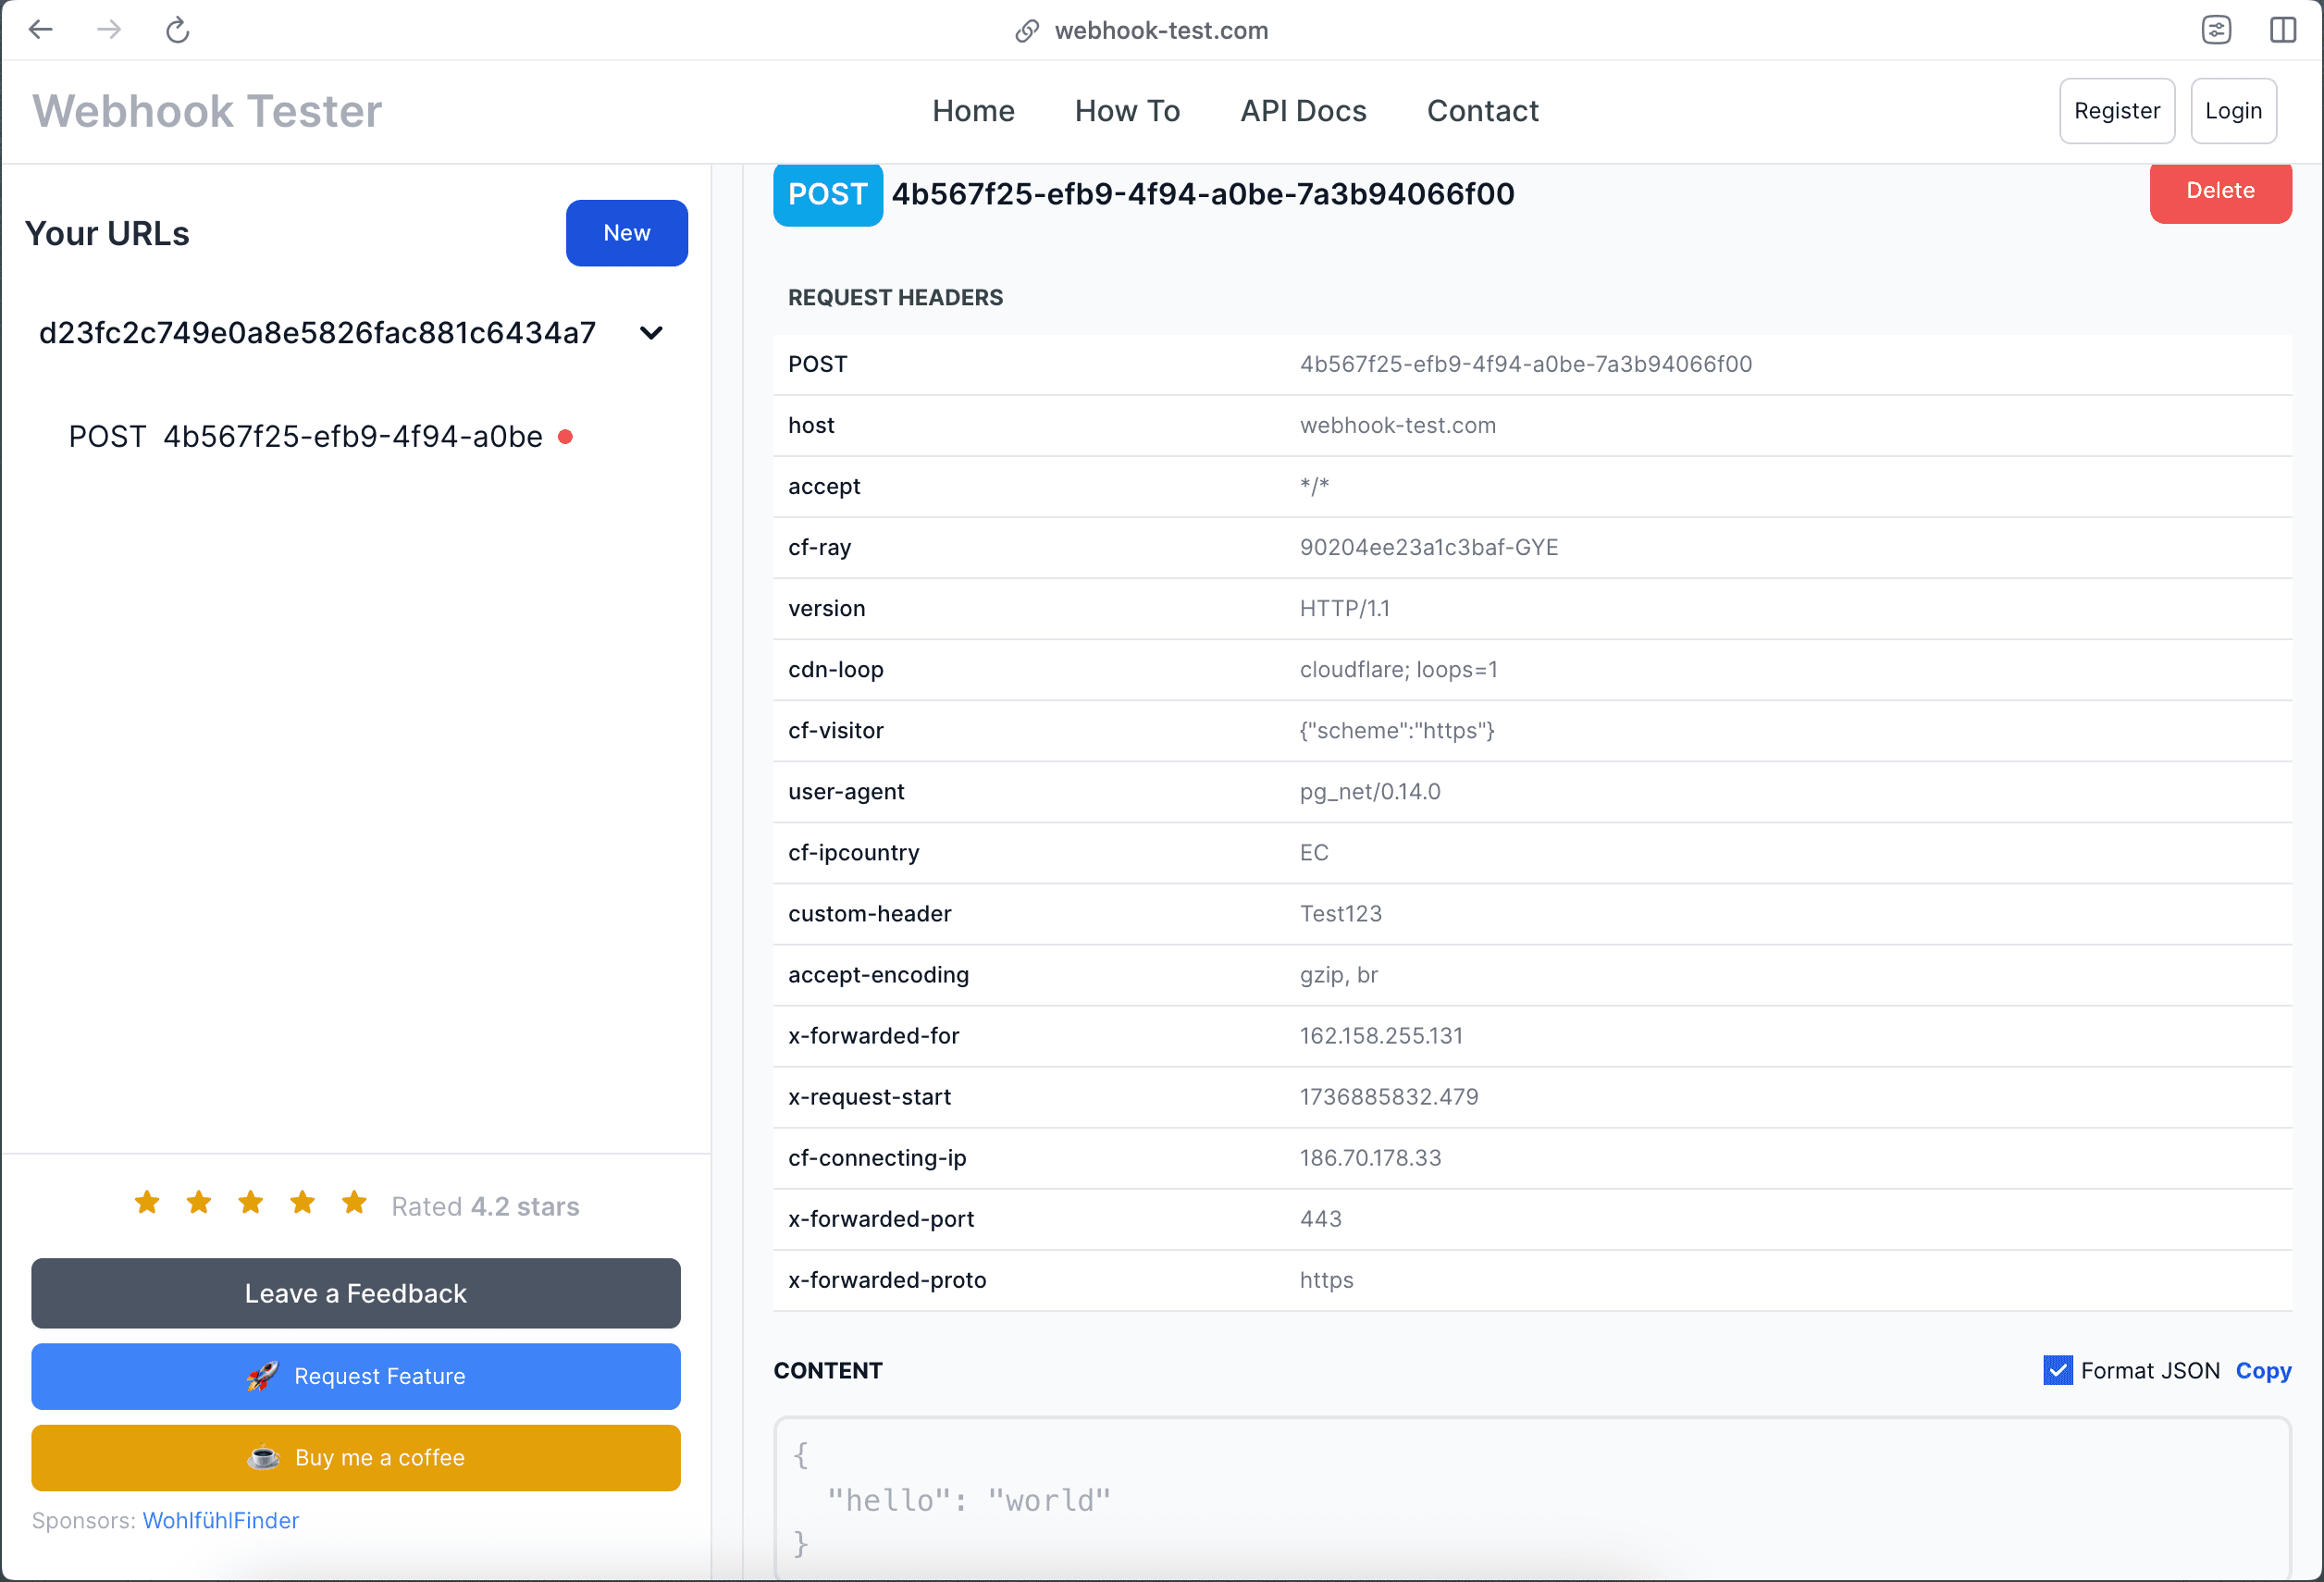
Awesome! This confirms pg_net is working in our environment 🎉
Integrating with the Trigger
Now let’s update our send_message_to_webhook function to use pg_net so it automatically triggers on new messages rows.
- Go to Database Functions in Supabase Studio and click on Edit Function under the
send_message_to_webhookfunction menu.
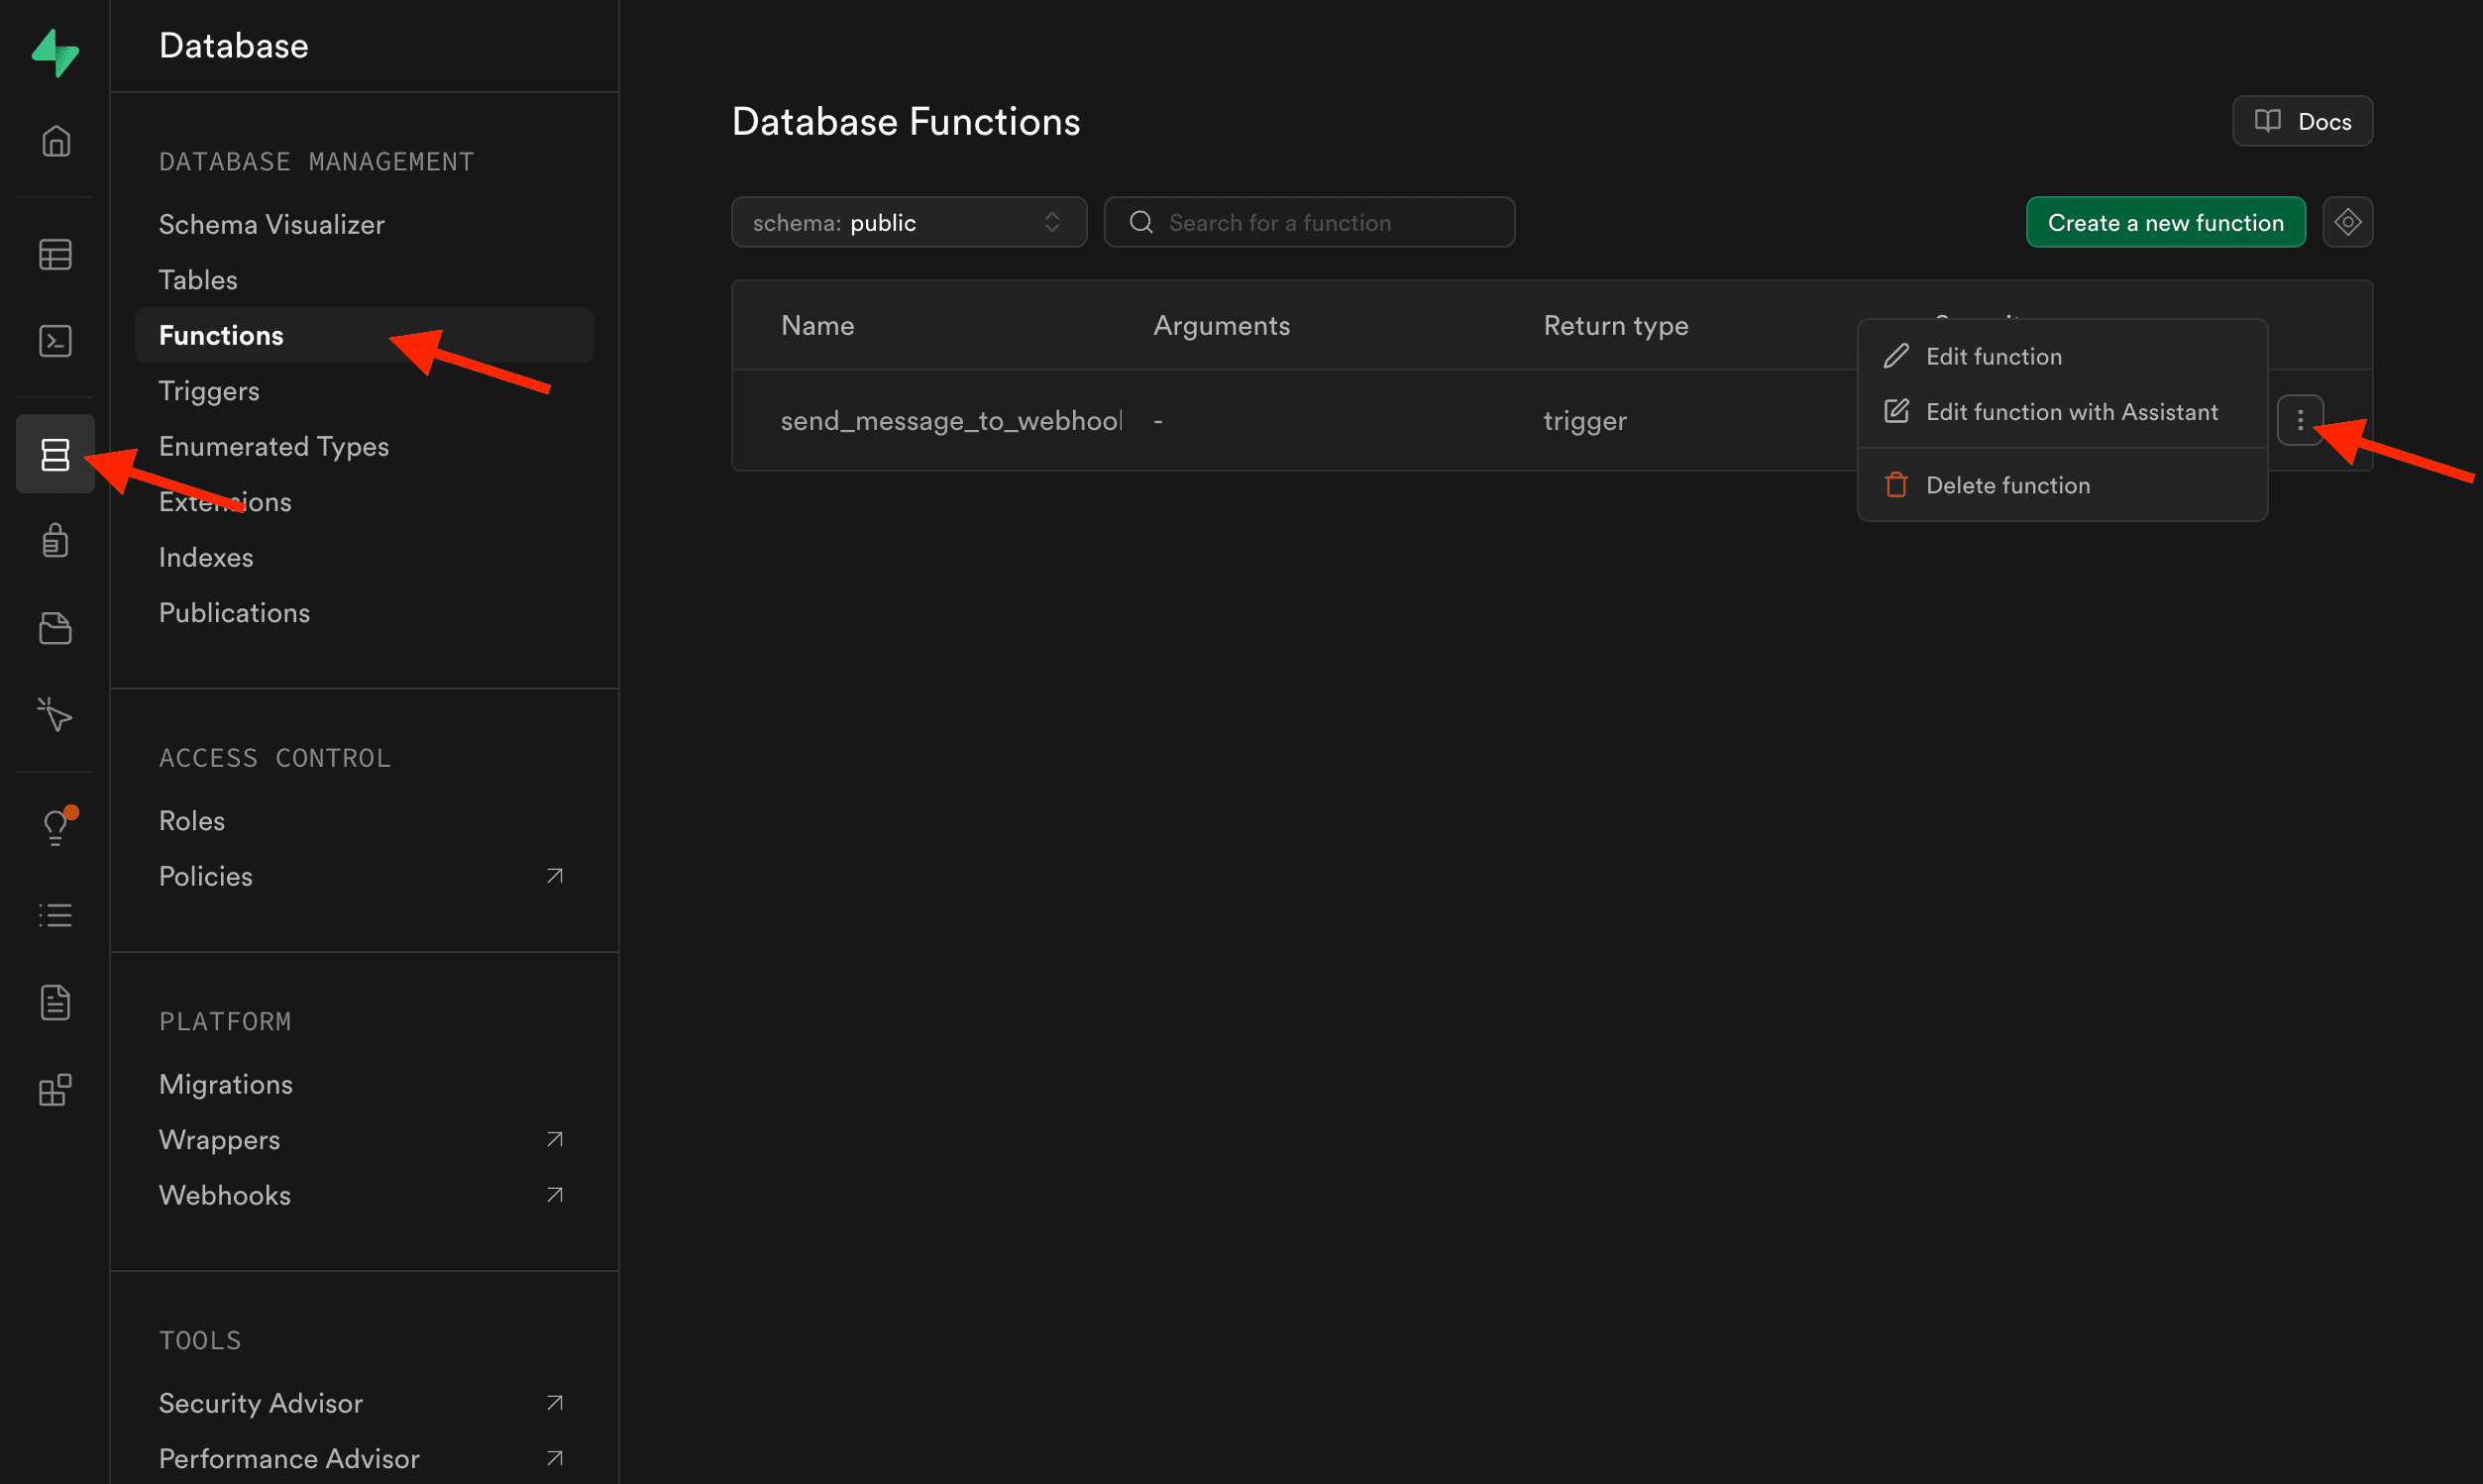
- Replace the function definition with with our updated
net.http_postcall:
BEGIN
  PERFORM net.http_post(
    'YOUR_TEMP_WEBHOOK_URL', -- replace this
    jsonb_build_object(
      'id', NEW.id,
      'message', NEW.message
    ),
    headers := jsonb_build_object(
      'Authorization', 'SOME-TOKEN'
    )
  );

  RETURN NEW;
END;
Notice a couple of things:
- We use
PERFORMinstead ofSELECT, because we’re inside a procedure-like context and we don’t need to store the result. - We are using the
jsonb_build_objectfunction to build the request payload instead of::JSONBcasting. This ways is more readable and maintainable. - We access the newly inserted row attributes using the
NEWrecord.
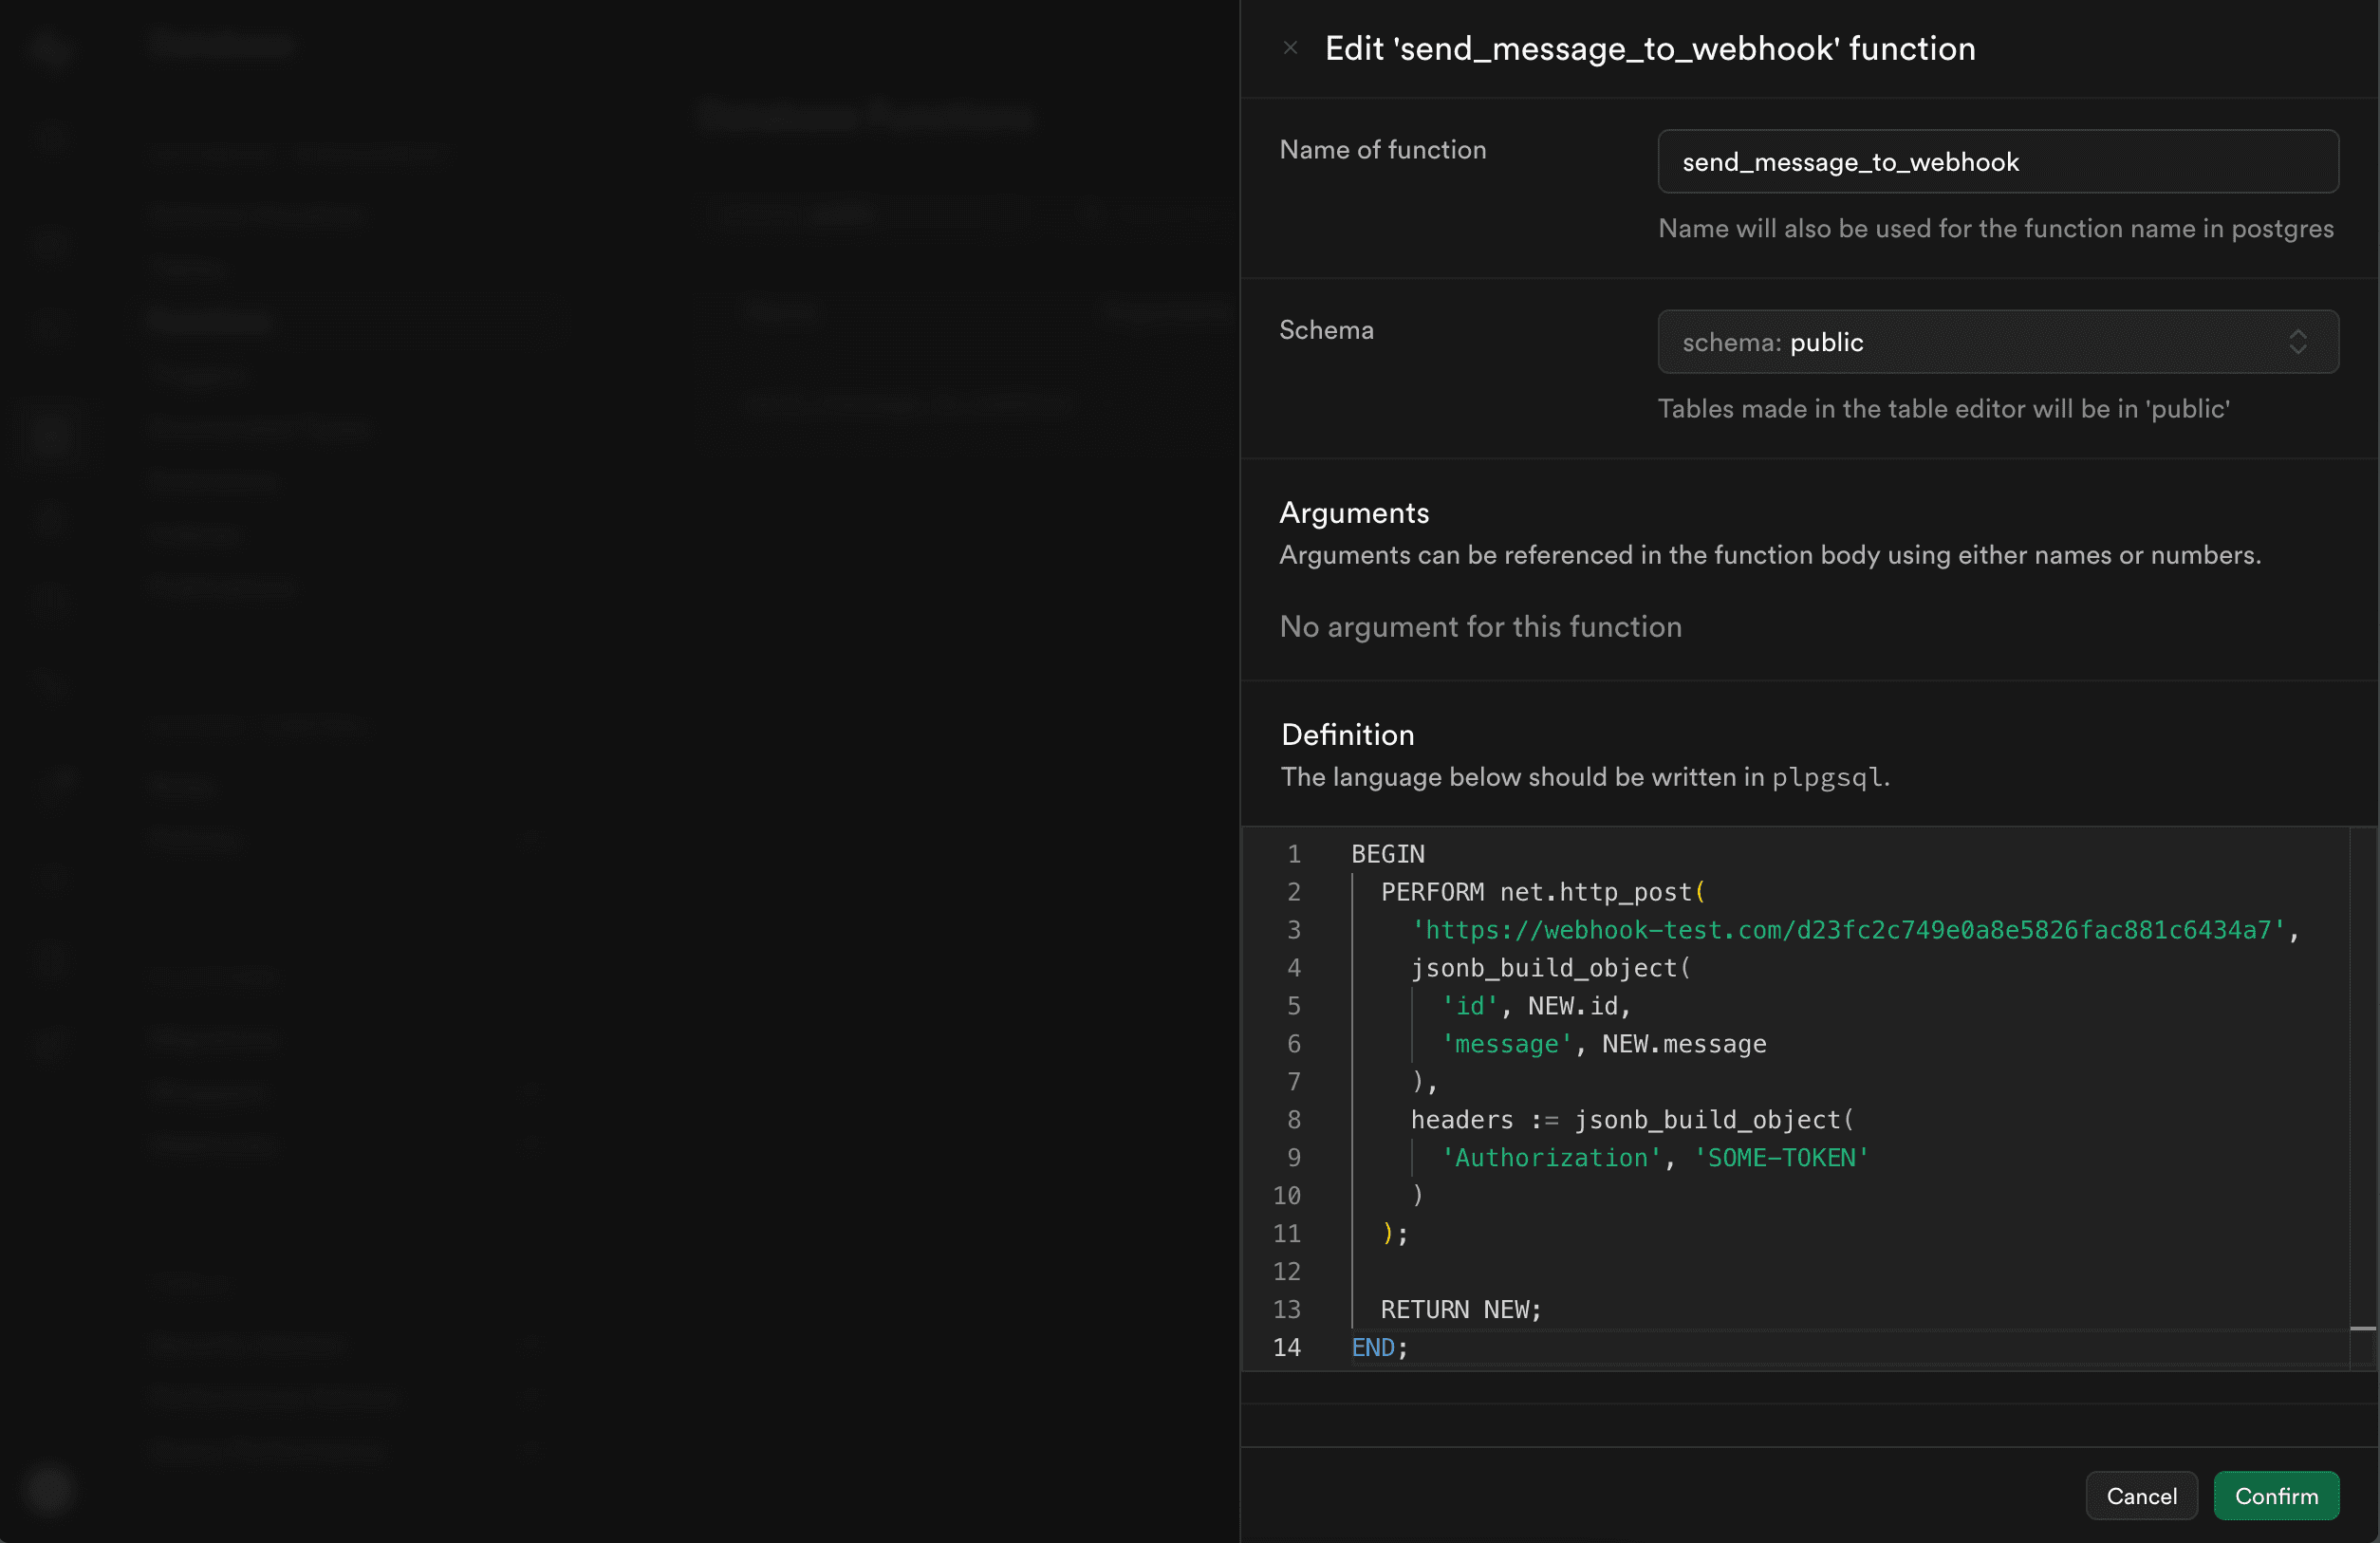
To save your changes click on Confirm, and let's test our trigger + function:
- Head to your
messagestable on the Table Editor. - Insert a new row with some sample message text.
- Check your webhook service, you should see a brand-new request with the payload containg the
idandmessageyou inserted 🎉
Now, let's move on to explore how we can use Supabase Vault to store our secrets (API keys) and more.
Why Use Vault?
Right now out API calls are working as expected, but our code has some security and scalability issues:
- Secrets in Code: If you need a real API token, you don’t want to hard-code it in your SQL.
- Different Environments: If you run differen environments like production | staging | local dev, you might have different tokens and endpoints.
This is where Supabase Vault shines. It provides encryption at rest and an easy way to manage and retrieve secrets from your Postgres Functions.
I highly recommend yout to check out the vault repo later: https://github.com/supabase/vault
Let's integrate Vault into our function.
Setting Up Secrets in Vault
First, confirm the Vault extension is enabled in your Supabase project (if you are using the provided base project, this is already enabled).
You can confirm this by going to Project → Integrations in Supabase Studio.
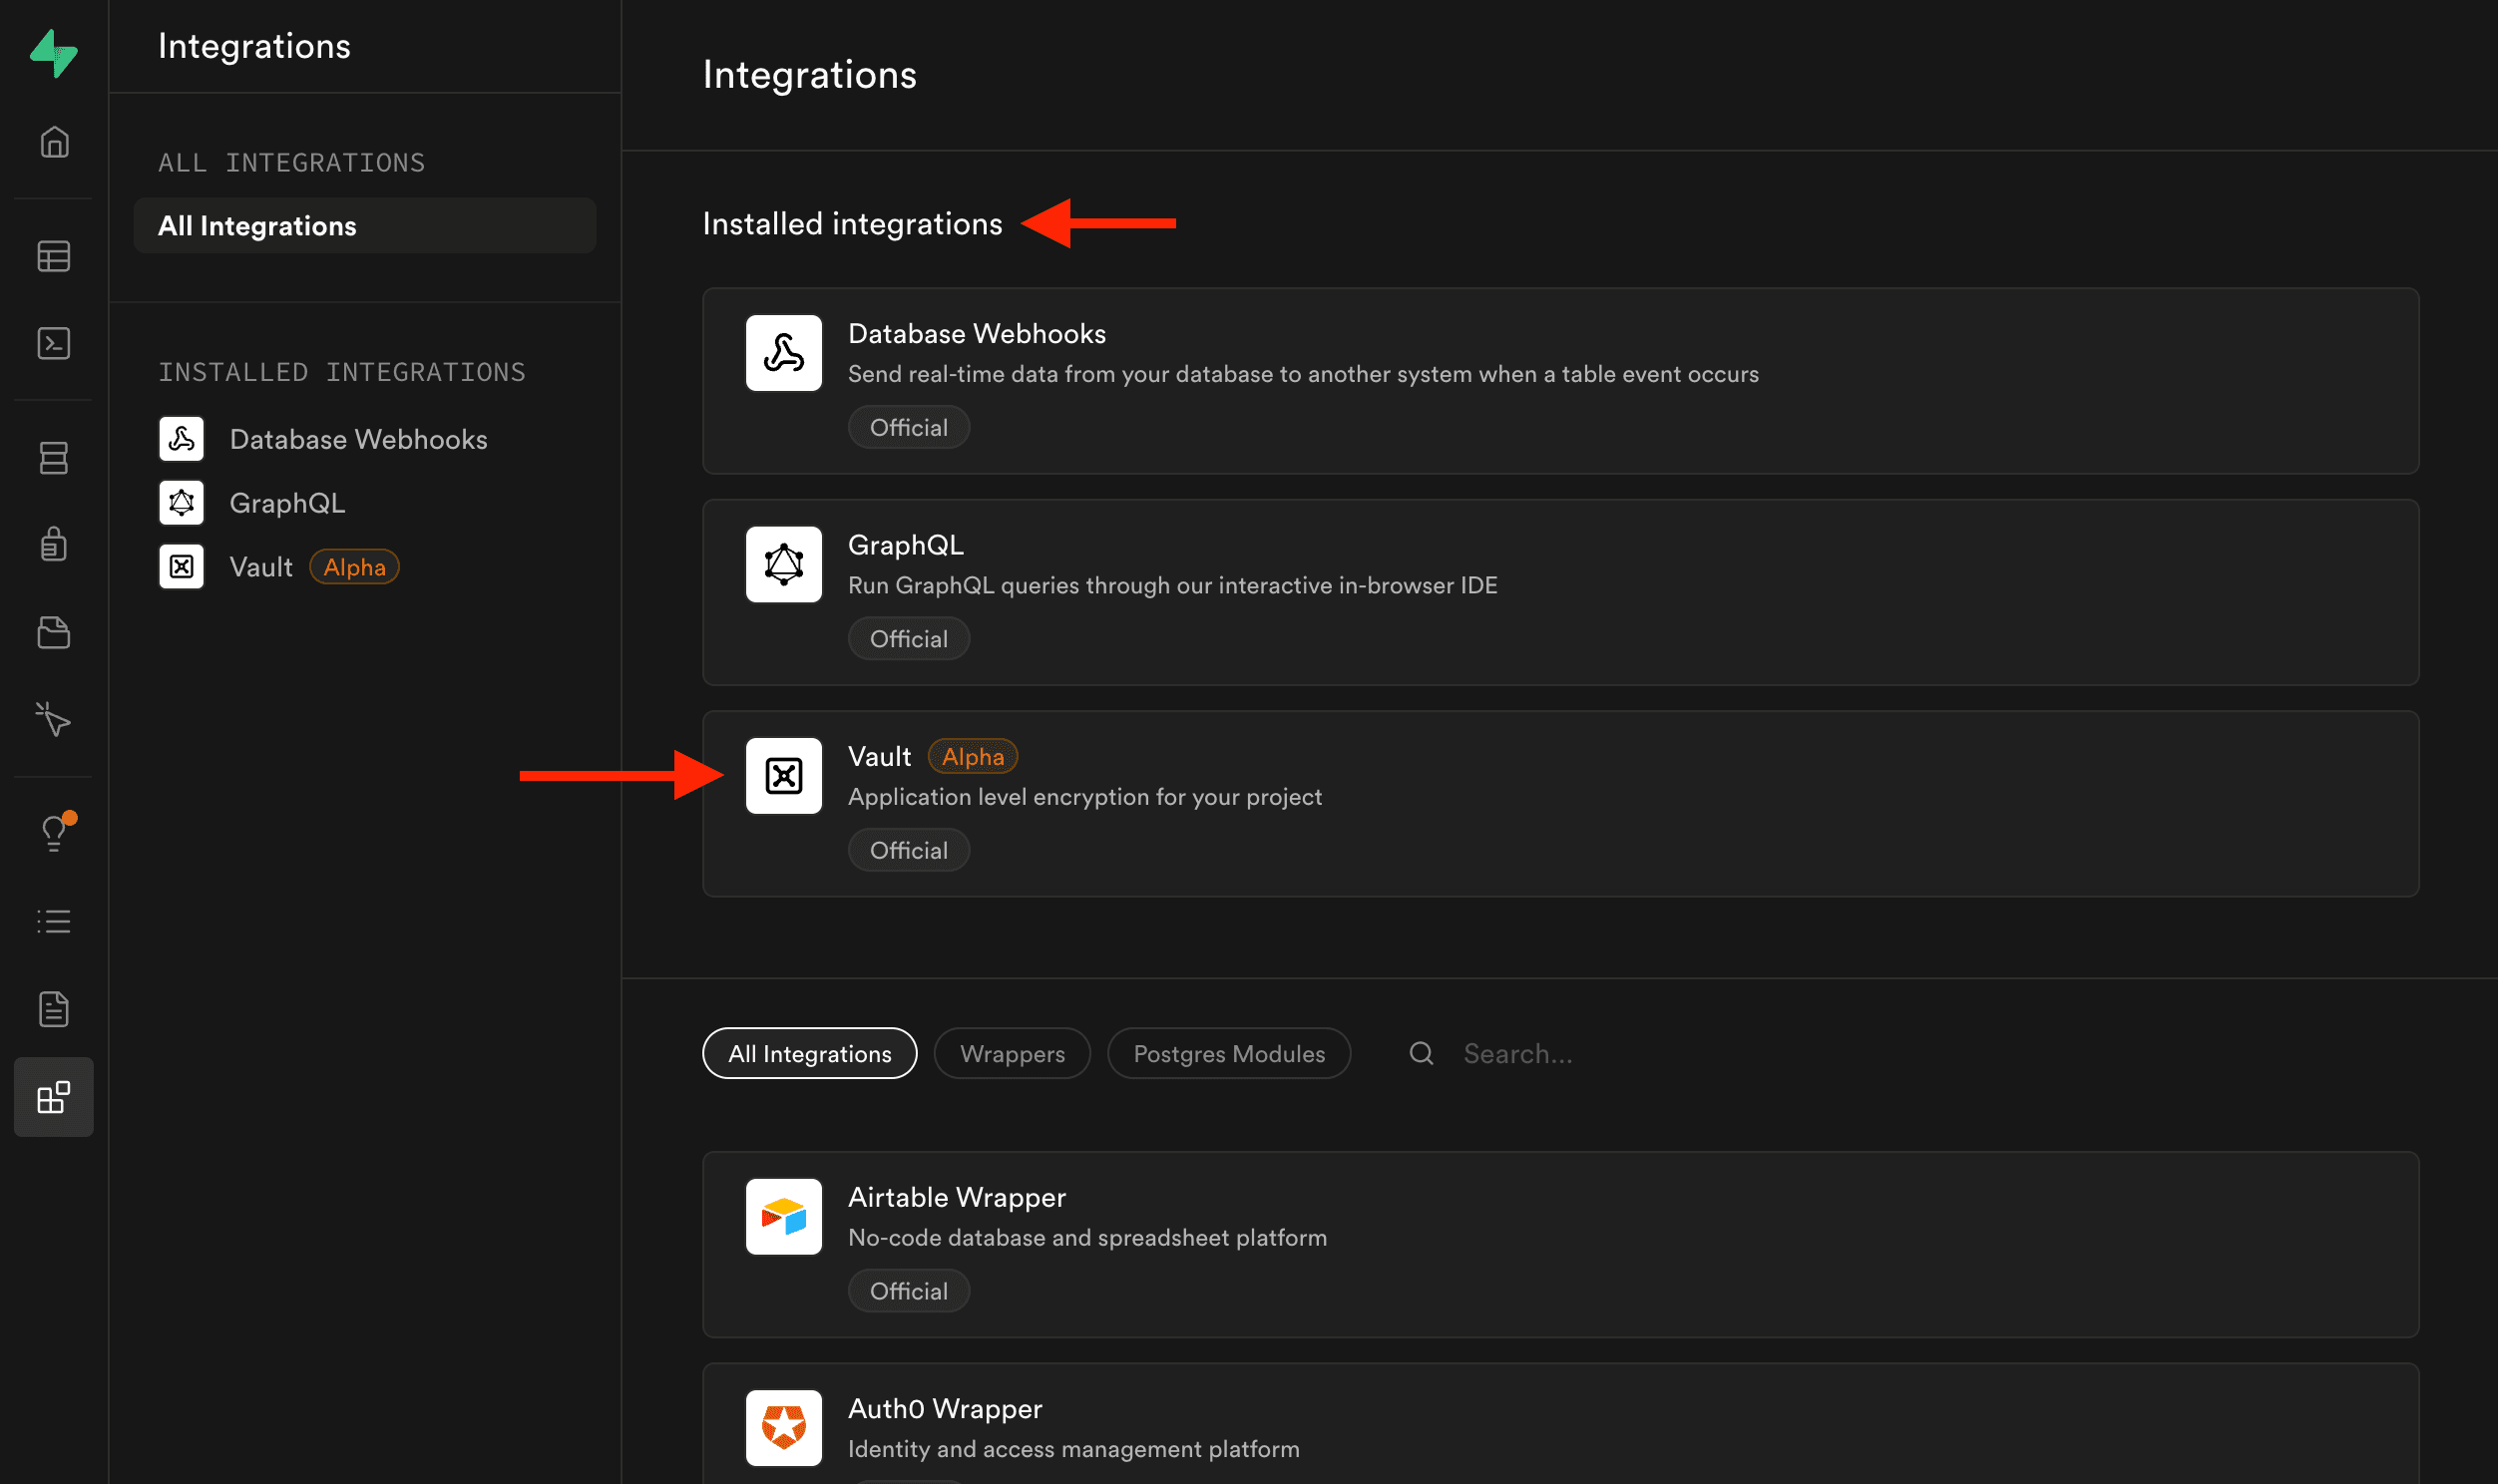
Now click on Vault and then click on the Secrets tab. And add the following secrets:
- WEBHOOK_URL_SECRET – full URL to your webhook.
- WEBHOOK_TOKEN_SECRET – API token (e.g.,
10203040for testing).
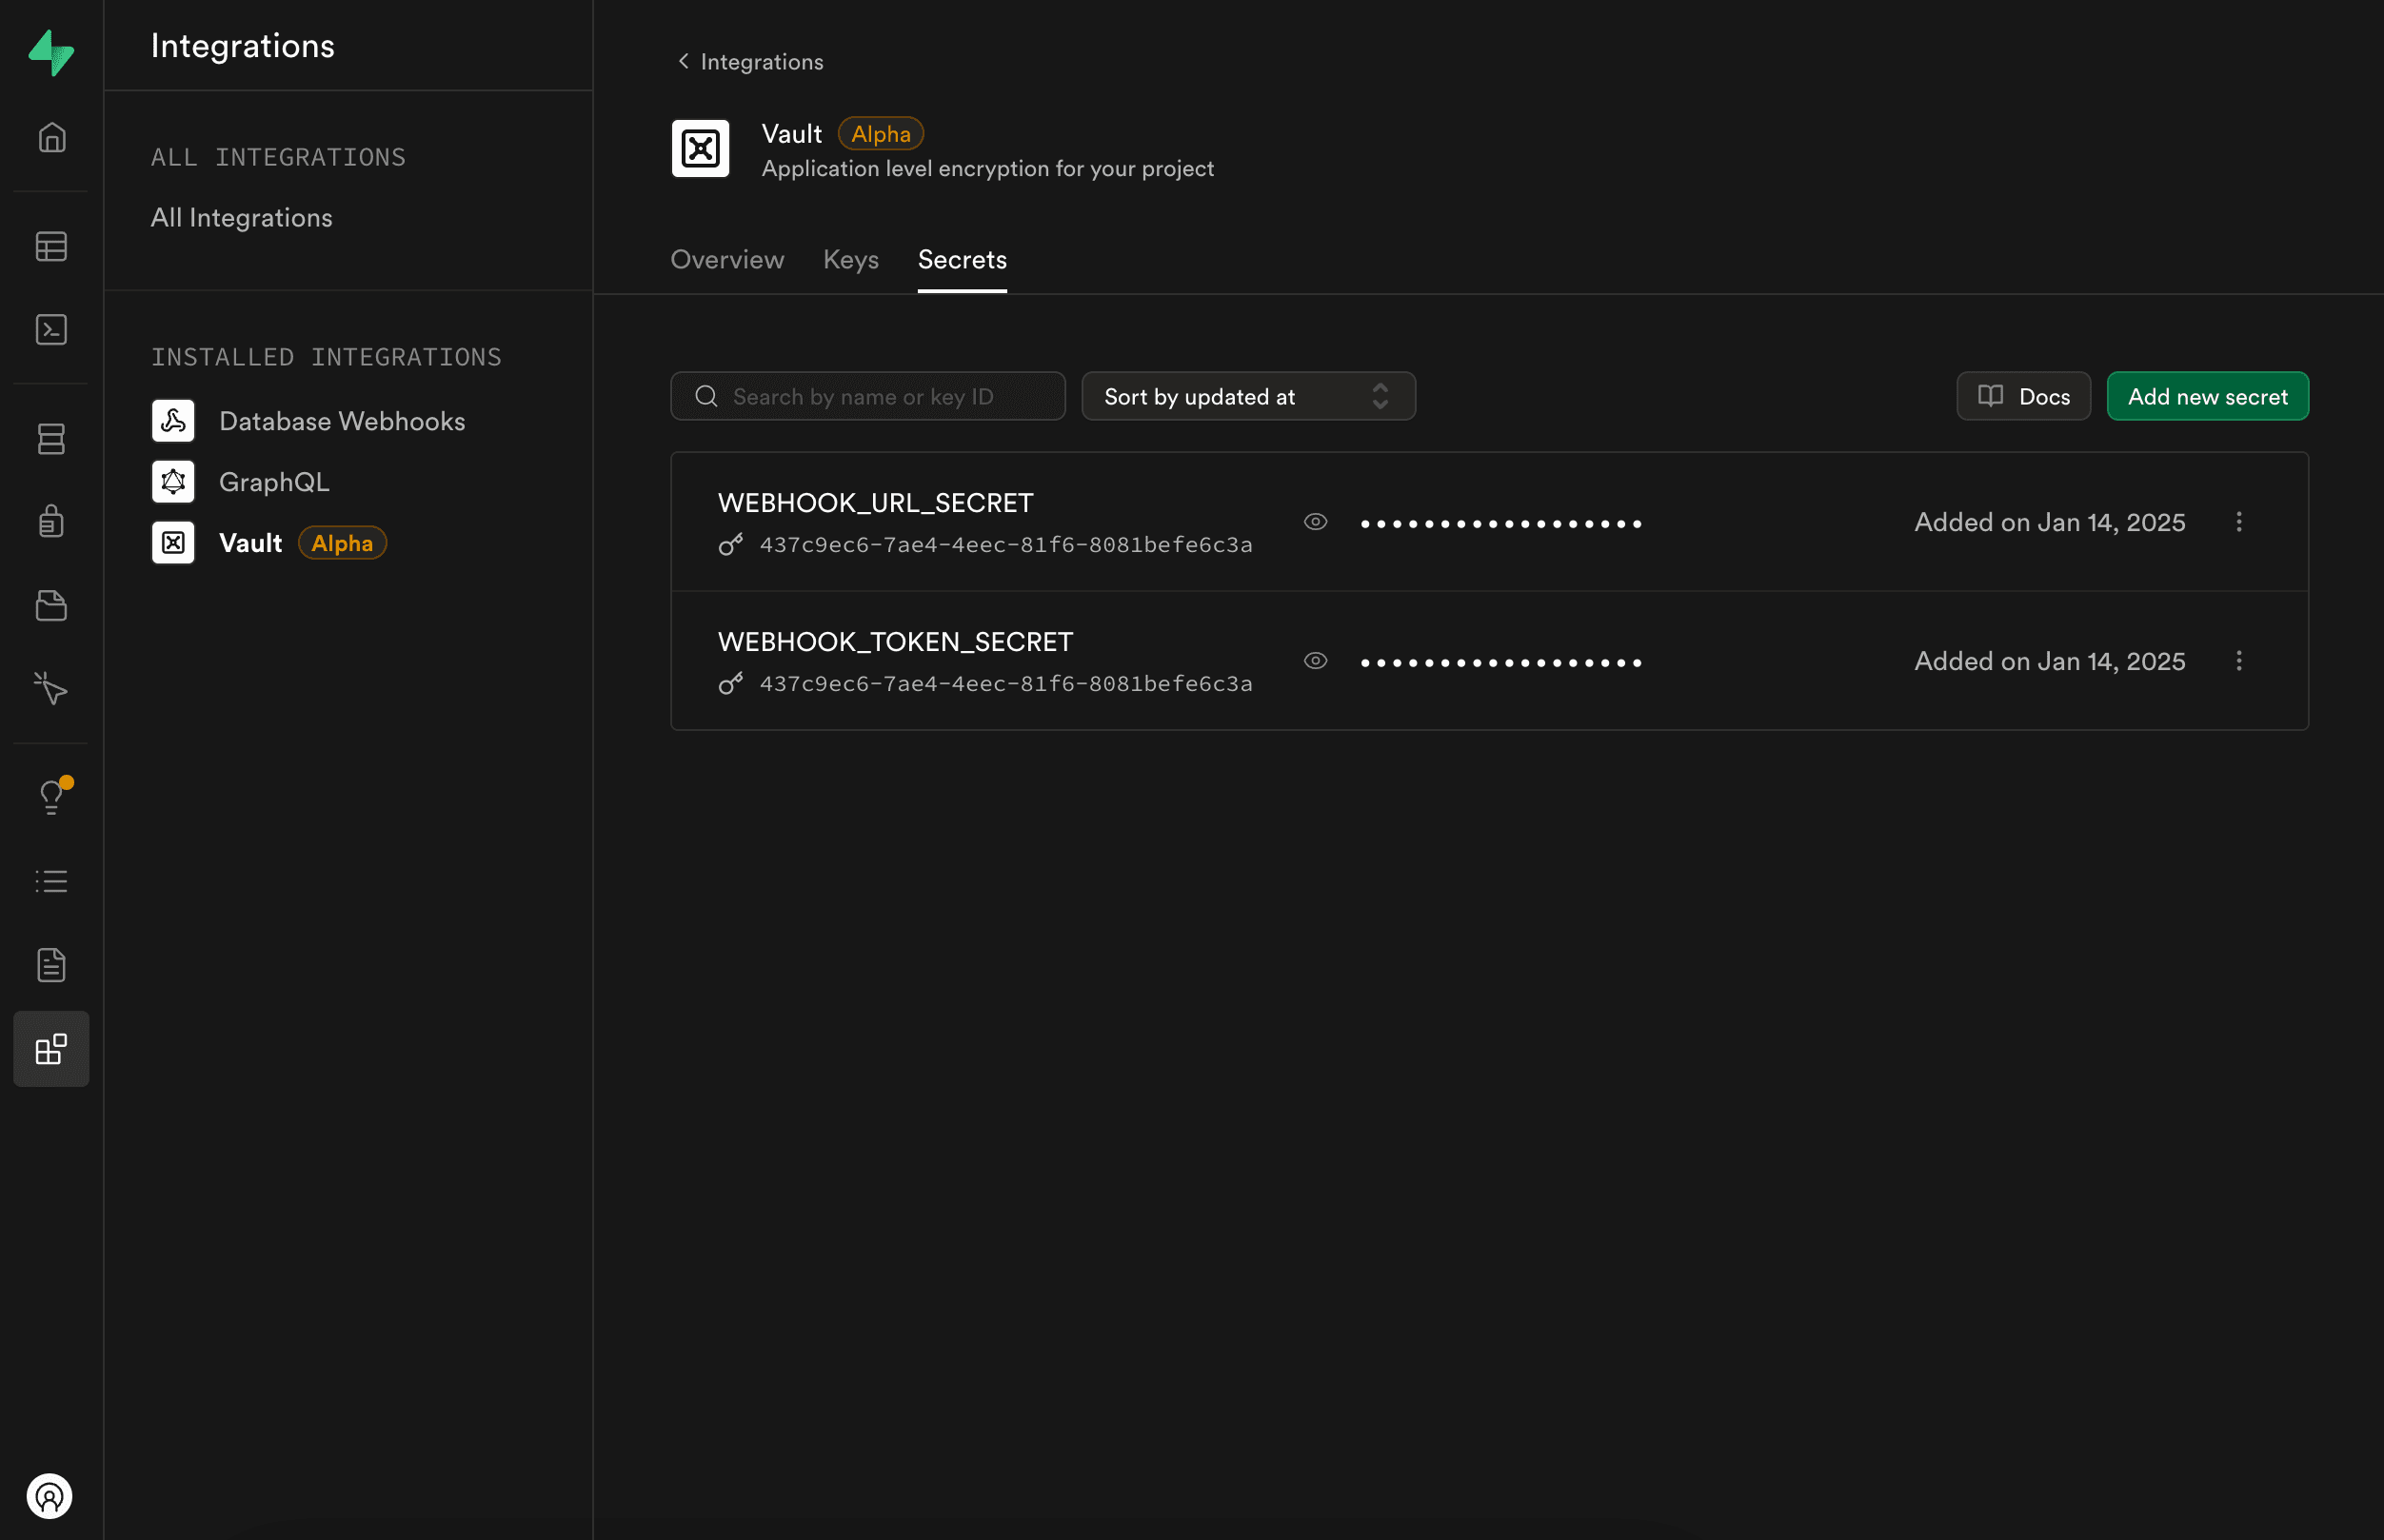
If this is your first time using Vault, you might need to create an encryption key. Just follow the prompt when creating the first secret.
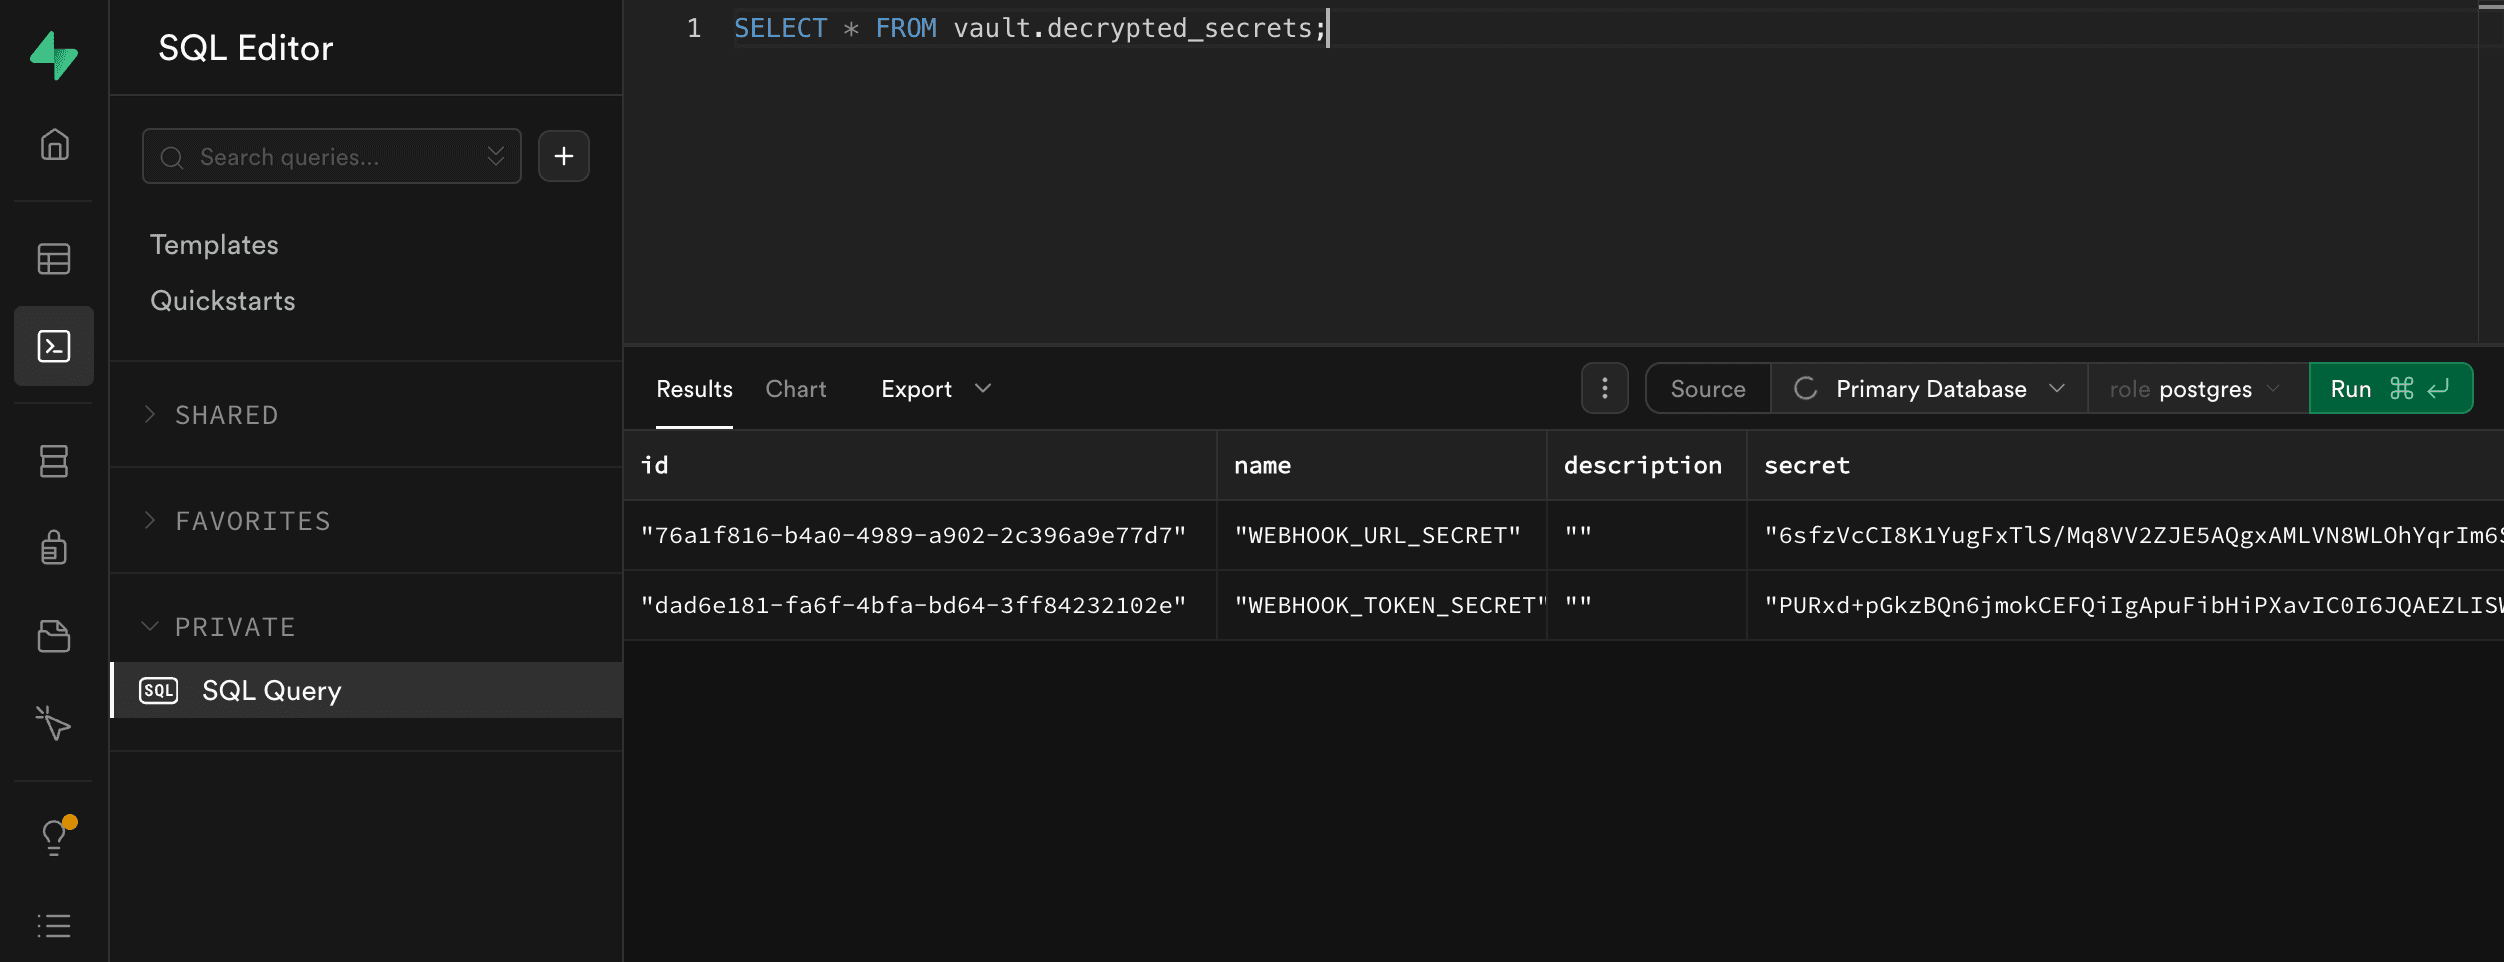
To verify they’re stored correctly, you can head to the SQL editor and run:
SELECT * FROM vault.decrypted_secrets;
You’ll see something like:
Reusable Secrets Decryption
Now that we have our secrets stored in Vault, we can use them in our SQL functions like this:
SELECT net.http_post(
  (SELECT decrypted_secret FROM vault.decrypted_secrets WHERE name = 'WEBHOOK_URL_SECRET'), -- your url secret value
  jsonb_build_object('id', 123, 'message', 'Hello world'),
  headers := jsonb_build_object(
    'Authorization', (SELECT decrypted_secret FROM vault.decrypted_secrets WHERE name = 'WEBHOOK_TOKEN_SECRET') -- your token secret value
  )
) AS request_id;
Test it out in the SQL editor, and the webhook should be called as expected. But this code is a bit verbose and hard to read. We can do better 😉, let's see how.
Creating a Utility Function
A cleaner pattern I personally like is to create a small helper db function to retrieve secrets:
CREATE OR REPLACE FUNCTION public.get_decrypted_secret(secret_name TEXT)
RETURNS TEXT AS $$
DECLARE
    secret TEXT := '';
BEGIN
    SELECT decrypted_secret
    INTO secret
    FROM vault.decrypted_secrets
    WHERE name = secret_name
    LIMIT 1;

    RETURN secret;
END;
$$ LANGUAGE plpgsql SECURITY INVOKER;
Run the code above from your SQL editor to create this function.
Now you can rewrite your http_post logic as:
SELECT net.http_post(
  get_decrypted_secret('WEBHOOK_URL_SECRET'),
  jsonb_build_object('id', 123, 'message', 'Hello world'),
  headers := jsonb_build_object(
    'Authorization', get_decrypted_secret('WEBHOOK_TOKEN_SECRET')
  )
) AS request_id;
This keeps your code more readable and maintainable, especially if you have several calls or need multiple secrets.
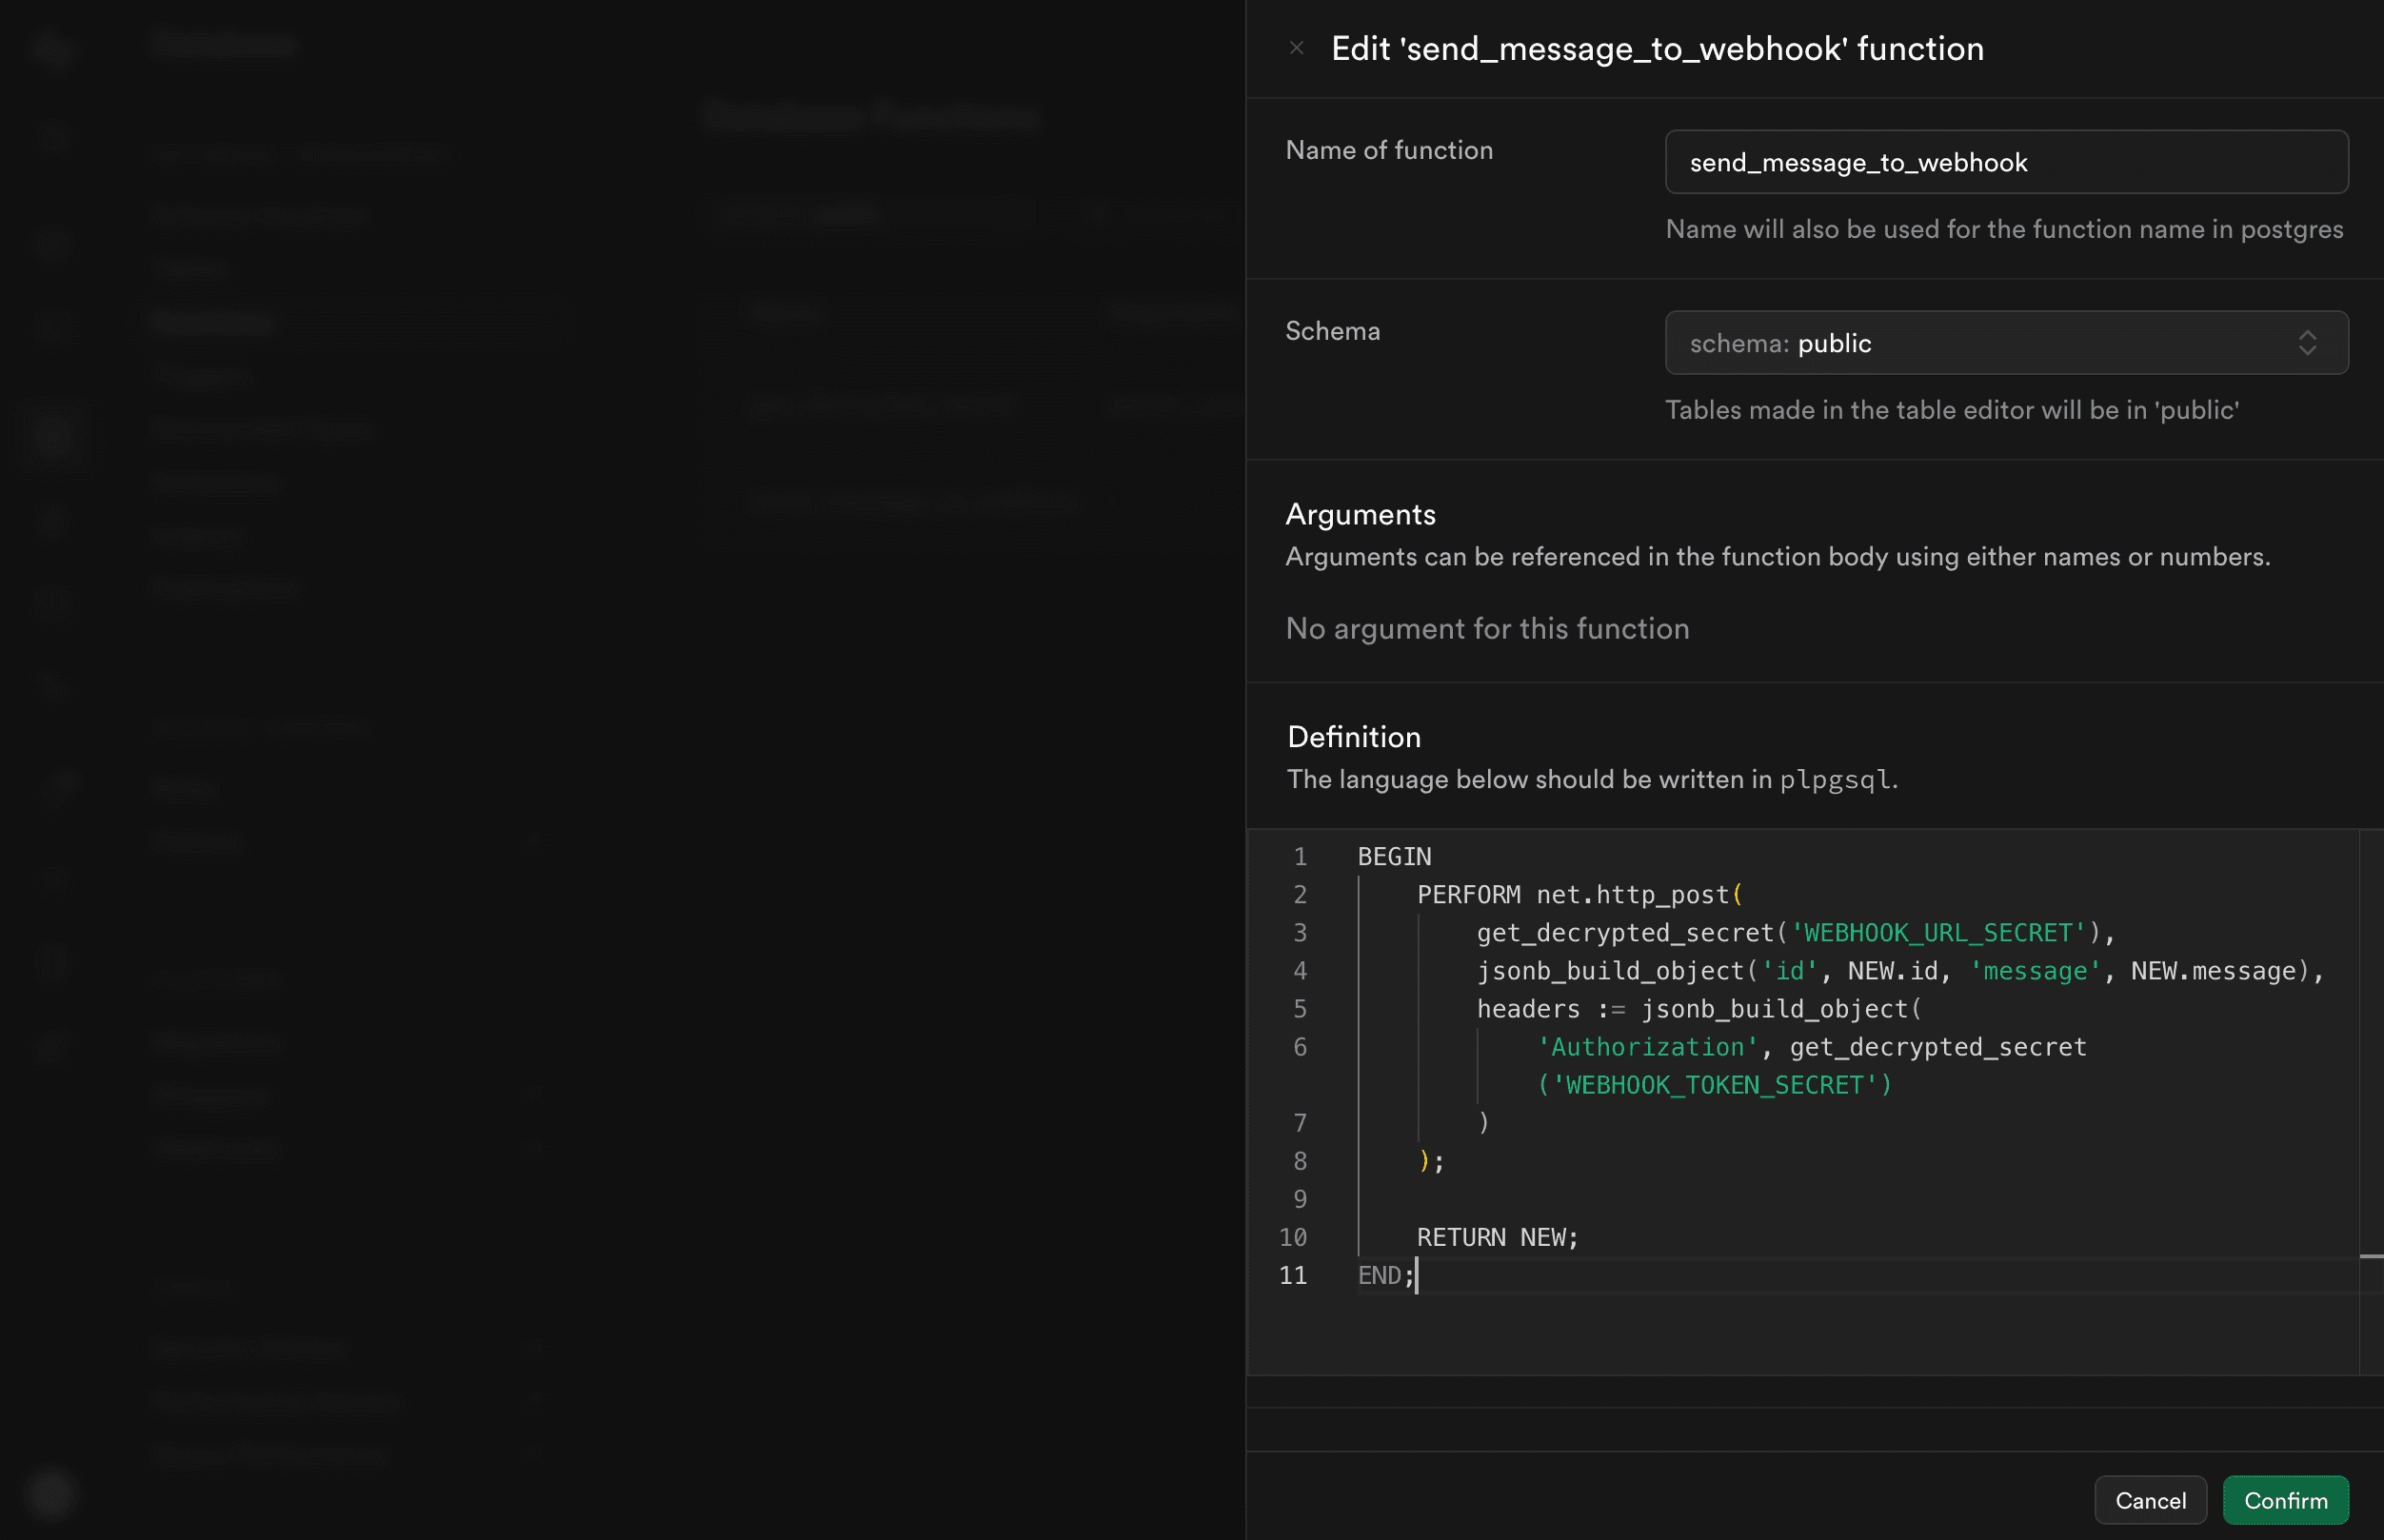
Now we are ready to update our send_message_to_webhook function to use get_decrypted_secret instead of hard-coding secrets.
PERFORM net.http_post(
  get_decrypted_secret('WEBHOOK_URL_SECRET'),
  jsonb_build_object('id', NEW.id, 'message', NEW.message),
  headers := jsonb_build_object(
    'Authorization', get_decrypted_secret('WEBHOOK_TOKEN_SECRET')
  )
);
Finally, test the flow again by inserting a new row into your messages table.
Everything should work as expected and you should see a new request in your webhook service.
Congratulations! You have set up a secure and scalable workflow for making HTTP requests from your DB functions using pure Postgres features 👏
Conclusion and Next Steps
This pattern scales nicely to all sorts of use cases—like Slack notifications, CRM integrations, or custom third-party APIs. You can also use Vault to manage environment-specific secrets (dev, staging, production) without rewriting your code.
In an upcoming post, I’ll demonstrate how to integrate this with a no-code automation tool for notifications and beyond.
Thanks for reading! For future posts and updates, follow me on X